



William Morris Fruit Light Wallpaper
William Morris Fruit Light WallpaperFree Shipping on orders $79+ · Arrives in 7 days
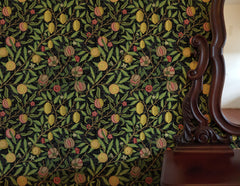
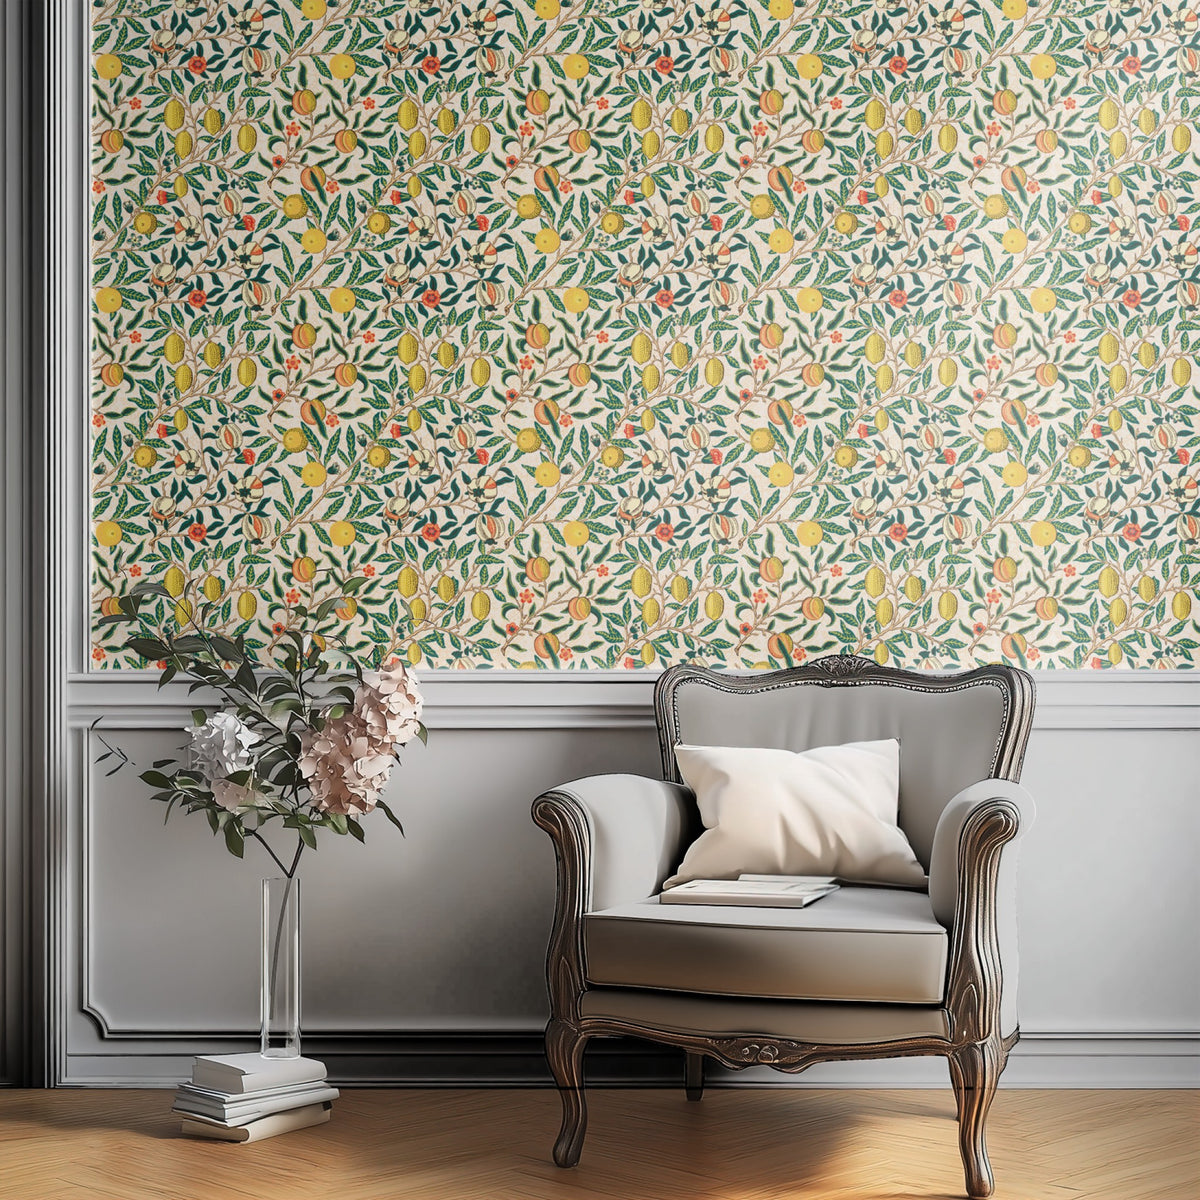
William Morris Fruit Light is a cream fruiting branch wallpaper. Yellow lemons, blushing pomegranates and orange-red blossom sit along slim brown branches with dark green and teal leaves, drawn over an oatmeal ground flecked like old paper. Open ivory between the branches keeps a busy motif feeling airy, and the yellow fruit sets the rhythm of the repeat. Sits well in a kitchen, a breakfast room or a country hallway.



☷ How many panels do I need?
Panels are 19 inches wide, printed to order in heights from 2 to 12 feet. Enter your wall size and we will set the size and quantity for you.
Your estimate
Couldn't load pickup availability

Pattern history
Fruit, also known as Pomegranate, is one of William Morris's earliest wallpapers. The design dates from about 1862 and the paper was first issued around 1866, possibly only the second Morris paper after Daisy. Its branches carry lemons, oranges, olives and pomegranates, and the V&A suggests the pomegranates may be the work of his close collaborator, the architect Philip Webb. The original design is in the V&A (E.299-2009).
How to Measure
How to Measure
1. Determine the Wall Width
Measure the horizontal span of the wall from corner to corner, recording the distance in inches. For projects covering multiple walls, measure each section individually and calculate the cumulative total.
2. Establish the Vertical Height
Measure the distance from the floor to the ceiling at the wall's highest point. If your space features baseboards or crown molding, measure only the visible wall surface between these architectural elements.
3. Account for Obstructions
While doors, windows, and built-in cabinetry reduce surface area, please include these spaces in your overall dimensions. Panels are designed to be installed across these openings and trimmed on-site to ensure the design flows seamlessly.
Important Note: To ensure perfect pattern alignment, do not attempt to combine panels of differing heights. Uniform panel height is essential for visual continuity.
Material Info
Material Info
We offer two wallpaper materials, each with its own advantages:
- A high-tack, repositionable Vinyl that grips securely yet removes cleanly. It’s fully renter-friendly and lets you adjust panels during install without fuss.
- A PVC-free, reinforced paper activated with water. Designed for durable, long-term projects, it’s best for walls where you won’t need to peel it off later.
Not sure which to choose? Our Material Guide and FAQ walk you through surface prep, installation, and longevity so you can pick with confidence.
Install Guide
Install Guide
Pre-Installation Preparation
- Curing Period: For recently painted or primed walls, please allow a minimum of 4 weeks for the paint to fully cure before installing your WM wallpaper.
- Surface Cleaning: Prepare the installation surface by wiping it down with a damp cloth or sponge and water to remove dust and debris. Allow the wall to dry completely before beginning the installation.
Panel Preparation
- Organize: Unroll your wallpaper and carefully cut along the dotted lines to separate the panels. Lay them out on the floor and check the pattern repeat. Panel numbering only matters for murals, where each panel is a different slice of one image and must go up in order. Repeating patterns can be hung in any order, because every panel carries the same repeat.
- Inspect: Before applying adhesive, examine all panels to ensure there are no defects or color inconsistencies from edge to edge.
- Verify Sequence: For murals that arrived in multiple rolls, layout matters: begin with Panel 1 and keep the numbered order. If you are unsure of a mural's sequence, contact our support team and we will confirm it. Repeating patterns need no sequence.
Installation Guide
1. Establish a Plumb Line
A perfectly vertical first panel is critical for the success of the entire project.
- Using a level and a pencil, measure 18.5 inches from the left corner where installation will begin.
- Mark a vertical line down the wall. This "plumb line" will serve as the alignment guide for the right edge of your first panel.
2. Starting Position
Begin installation in the top-left corner of the surface.
- Overhang: We recommend allowing approximately one inch of excess material on the left edge and above the ceiling line. This accounts for any wall irregularities and ensures a straight install. This excess will be trimmed later.
- Pro Tip: If you are wallpapering an entire room, begin in the least conspicuous corner.
3. Applying the First Panel
- Positioning: Take your first panel (for murals, Panel 1) and make sure the label text is at the bottom so the panel is the right way up. Peel back the top 18–24 inches of the backing paper.
- Adhesion: Align the right edge of the panel strictly with your pencil plumb line. Gently press the exposed adhesive against the wall.
- Smoothing: Use the provided smoothing tool and your hands to secure the paper. If the alignment is off, slowly peel the paper back and reposition it—WM wallpaper is designed to be repositionable.
- Completion: Once the top is secured, peel the backing down in 5–10 inch increments. Smooth the wallpaper from the center outwards to eliminate air bubbles.
- Pro Tip: To manage the panel easily, fold the peeled backing paper downward and crease it to keep it out of the way.
4. Pattern Matching & Overlap
- Alignment: Peel back the top section of the second panel. Apply it so that the left edge overlaps the previous panel by approximately ½ inch.
- Visual Check: Adjust the panel until the pattern repeats match visually. Use a gentle touch to avoid stretching or warping the material.
- Do Not Trim: Do not trim this overlap. The ½ inch overlap is intentional and required for a seamless visual repeat. Continue this process for all subsequent panels.
5. Finishing Touches
Once all panels are installed, use a sharp utility knife to trim the excess material at the ceiling, baseboards, and corners.
Installation Complete. Step back and enjoy!


Material Differences
-

Luxe Traditional
 Premium Feel Non-Woven
 Paste-The-Wall Application
Easy Slide-In-Place Alignment
Ideal for Textured Walls
Butted Joint (No Overlap)
10.2 Mil Ultra-Thick Profile
-

Peel & Stick
Self-Adhesive Vinyl
Removable Sticker
Renter-Friendly
Wipeable
Easily Removable
Overlap Seam
Matte Coating
4.5 Mil Slim Profile
-

Luxe Peel & Stick
Self-Adhesive Backing
Butted Joint (No Overlap)
10.2 Mil Ultra-Thick Profile
Matte Luster Finish
Easy Install & Clean Removal
Ideal for Smooth or Lightly Textured Walls
Designer Finish for Elevated Spaces


More William Morris Designs
-
Regular price From $8.00 CADRegular priceUnit price per
-
Regular price From $8.00 CADRegular priceUnit price per
-
Regular price From $8.00 CADRegular priceUnit price per
-
Regular price From $8.00 CADRegular priceUnit price per


